Your yacht's gelcoat faces relentless UV and salt damage on Long Island Sound. Learn how professional marine paint correction restores that mirror finish—and keeps it.
Share:
Summary:
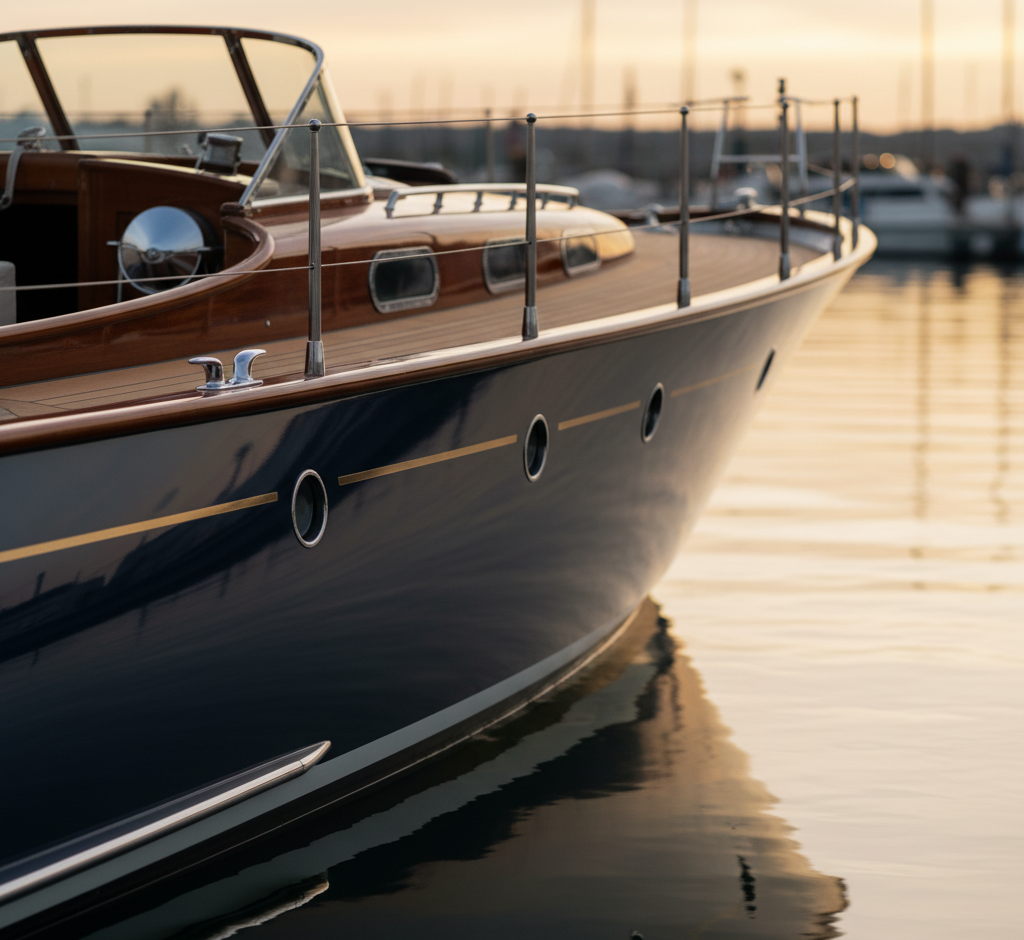
Gelcoat oxidation isn’t dirt. It’s not something you can wash away with soap and water, no matter how much elbow grease you apply.
When UV rays from the sun hit your yacht’s gelcoat, they break down the polymer chains that give the surface its smooth, glossy finish. Oxygen molecules then bond with these damaged polymers, creating a chalky white substance that literally embeds itself into the microscopic pores of your gelcoat. What was once a slick, light-reflecting surface becomes rough and cracked at levels you can’t even see without magnification.
Nassau and Suffolk County boat owners face accelerated timelines for this damage. Long Island Sound’s saltwater environment doesn’t just sit on your hull—it evaporates, leaving behind salt crystals that corrode gelcoat at the molecular level. Add in the intense UV reflection bouncing off the water, and you’ve got conditions that can turn a pristine finish chalky in a single season if left unprotected.

Most boat owners don’t realize they have an oxidation problem until it’s already moderate to severe. That’s because the damage starts invisibly, working its way into those microscopic gelcoat pores long before you see obvious chalking.
Light oxidation shows up as a slight loss of gloss. Your boat still shines, but it doesn’t have that deep, wet look anymore. This typically happens anywhere from three to twelve months after your last detail or protective wax application. The surface might feel smooth to the touch, but if you run your hand across it, you might pick up a faint white residue on your fingers.
Medium oxidation is when the gelcoat loses its gloss completely. The surface looks flat and chalky, especially on sun-exposed areas like the starboard side if you dock port-to, or any horizontal surfaces that catch direct UV. This usually develops after twelve months or more of neglect. At this stage, simple waxing won’t bring back the shine—you’re looking at compounding work to remove the damaged layer.
Heavy oxidation is the most severe stage, and it’s expensive to fix. The gelcoat takes on a dull, powdery appearance. Colors fade noticeably. You might see visible pitting or rough spots where the surface has actually started to break down structurally. Before professional restoration, gloss meter readings on heavily oxidized boats can drop as low as 38.9, compared to readings above 75 on properly maintained surfaces. At this point, you’re not just restoring appearance—you’re preventing permanent damage that could require complete refinishing or even structural gelcoat repair.
The hand test is your simplest diagnostic tool. Run your palm firmly across your hull. If it comes away clean, you’re in good shape. If you see white residue on your hand, you’ve got oxidation working its way through the surface. The more chalky powder that transfers, the deeper the problem goes.
If you’ve ever talked to boat owners in freshwater lakes or even other coastal areas, you might have noticed they don’t deal with oxidation at the same pace you do. That’s not coincidence—it’s chemistry and geography working against you.
Long Island Sound creates a perfect storm for gelcoat deterioration. The saltwater itself is corrosive, but the real damage happens during evaporation. When seawater dries on your hull, it leaves behind concentrated salt crystals. These crystals don’t just sit there harmlessly—they actively work their way into gelcoat pores, creating tiny channels for moisture and oxygen to penetrate deeper into the surface. Every time your boat sits at the dock between uses, this process continues.
UV intensity on the water is dramatically higher than on land. The sun hits your boat from above, but it also reflects off the water surface, essentially doubling your UV exposure. This reflected radiation attacks the underside of overhangs and areas that would normally be shaded. Even on overcast days, UV rays penetrate cloud cover and bounce off the water, continuing the oxidation process.
Temperature swings between seasons add another layer of stress. Your gelcoat expands and contracts with heat and cold. In summer, surface temperatures on dark-colored hulls can exceed 150°F in direct sun. Come winter, that same surface might drop below freezing. These constant expansions and contractions create microscopic stress fractures in the gelcoat, giving oxidation and salt more entry points to accelerate breakdown.
Atlantic coastal humidity keeps moisture in constant contact with your gelcoat. Even when your boat isn’t in the water, the air itself carries enough moisture to keep oxidation processes active. Inland boats in drier climates simply don’t face this level of continuous environmental assault.
This is why traditional marine wax fails so quickly in Nassau and Suffolk Counties. Products that might last three to four months in freshwater environments break down in weeks here. You’re not doing something wrong—you’re fighting an environment that’s exponentially more aggressive than what most marine products are designed to handle.
Want live answers?
Connect with a Legacy Motors & Marine expert for fast, friendly support.
Restoring oxidized gelcoat isn’t a single-step process. It’s a carefully staged approach that removes damaged material, rebuilds the surface, and then protects it from future deterioration.
The correction process starts with assessment. Not all oxidation requires the same treatment, and using too aggressive an approach on lightly oxidized gelcoat can actually cause more harm than good by removing more material than necessary. We use gloss meters to get objective readings of surface condition, but experienced eyes and hands can tell you a lot about what’s needed.
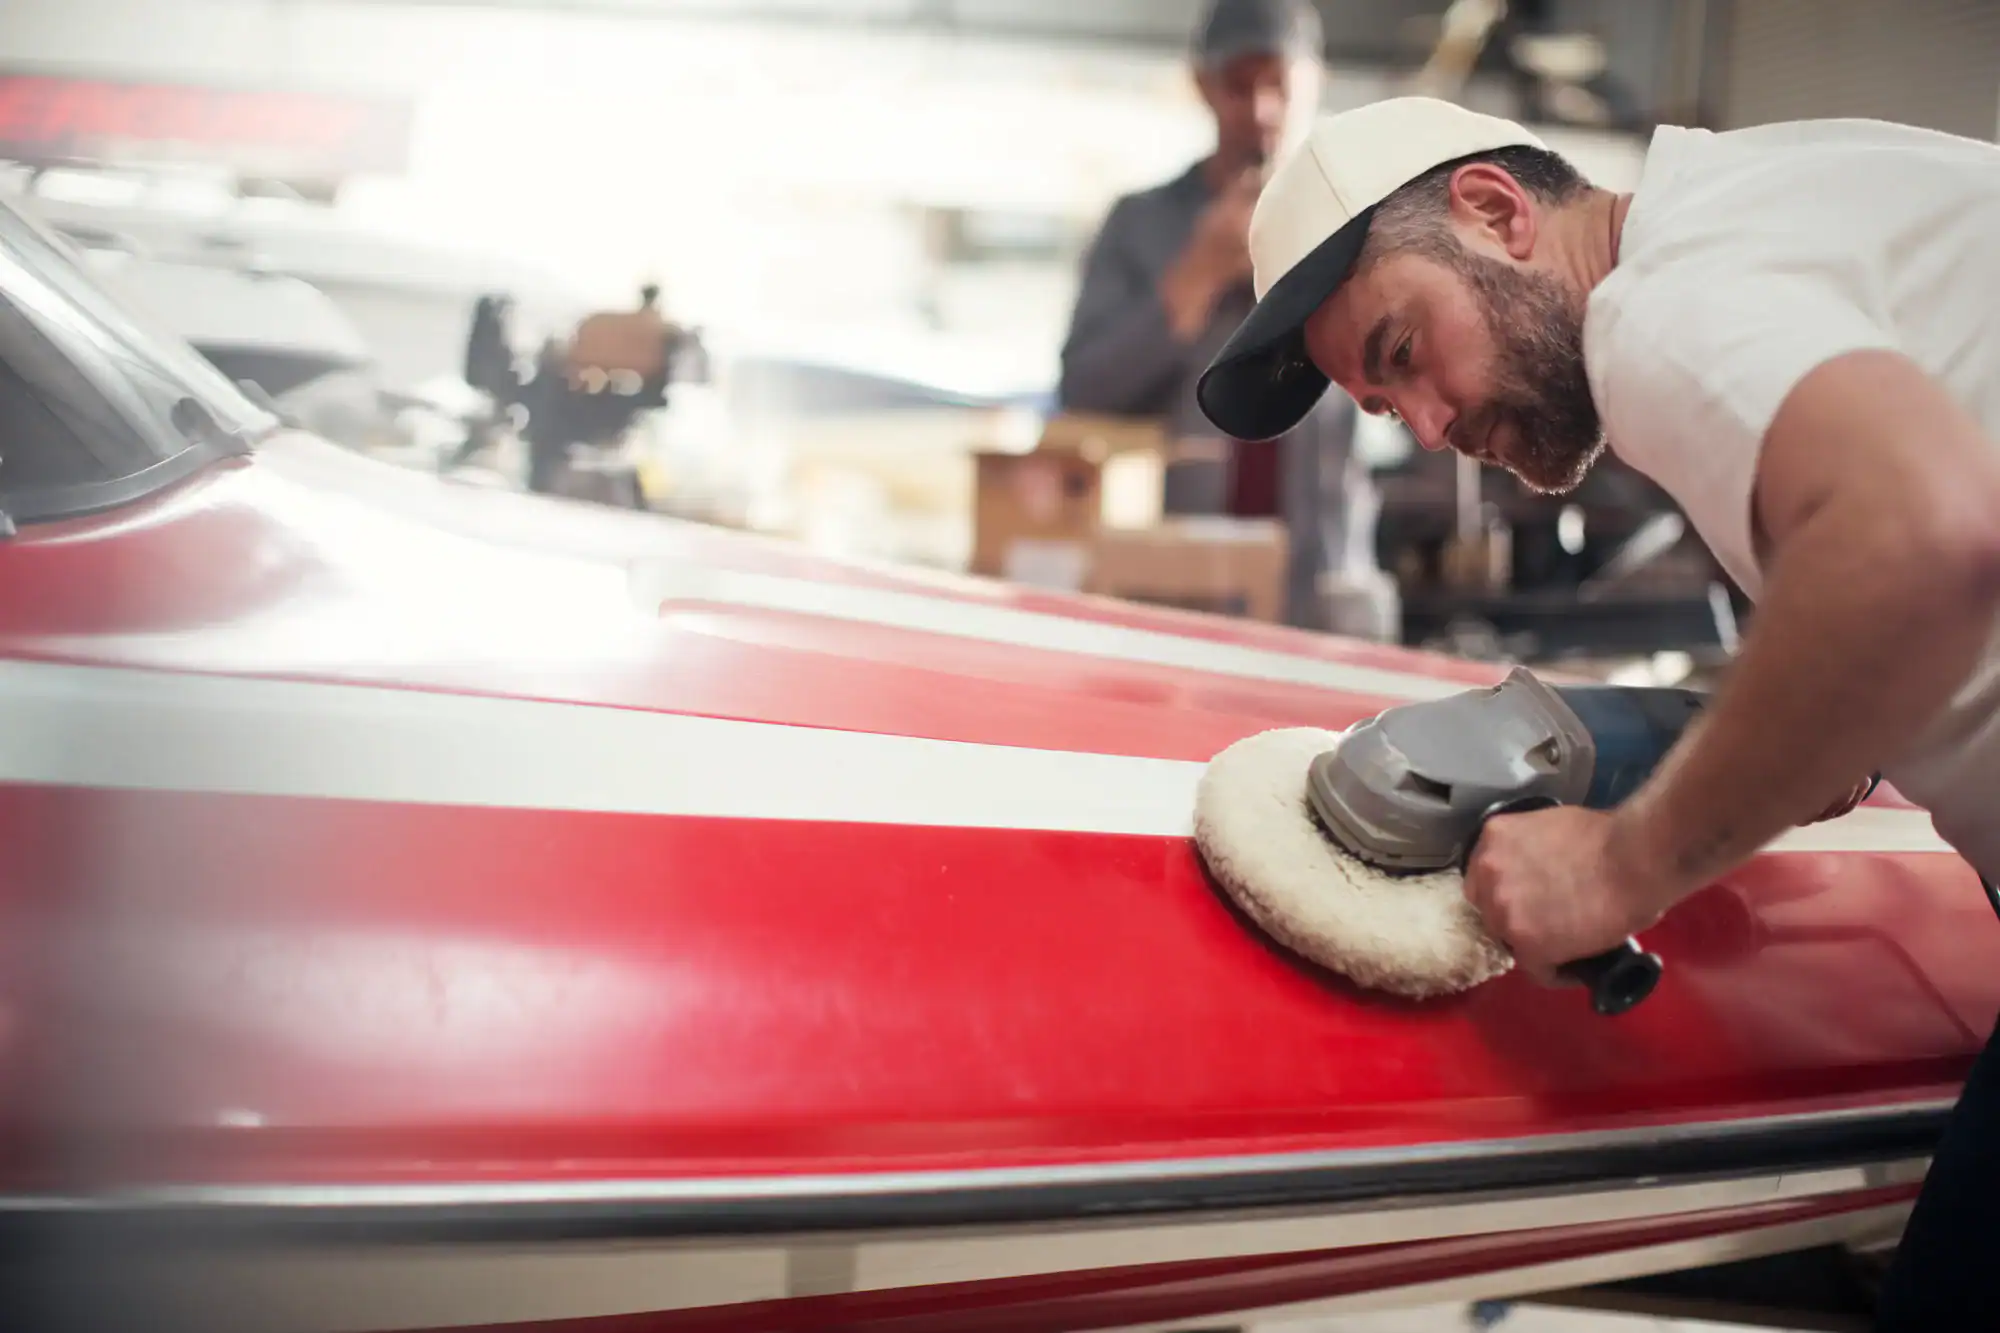
Once the severity is determined, the real work begins with compounding—using abrasive compounds to physically remove the oxidized layer and expose fresh gelcoat underneath. This isn’t buffing or polishing in the traditional sense. You’re actually cutting away microscopic amounts of damaged material to reveal the undamaged surface below.
Compounding is where amateur attempts usually fail. It’s not about working harder—it’s about understanding how abrasives, pad selection, machine speed, and heat management all work together to remove oxidation without creating new problems.
Heavy oxidation requires starting with aggressive cutting compounds. These products contain larger abrasive particles, typically in the 3-5 micron range, that can cut through significant oxidation quickly. But here’s the catch: aggressive compounds leave their own marks—swirl patterns and fine scratches that need to be addressed in subsequent steps. Using a wool or microfiber cutting pad with a rotary or dual-action polisher, we work in small sections, keeping the pad flat against the surface and moving constantly to prevent heat buildup.
Heat is the enemy during compounding. When friction generates too much heat, it can actually soften the gelcoat, leading to uneven results and potential damage. This is why we use variable-speed machines and frequently check surface temperature by touch. If the gelcoat feels hot, you’re working too fast or applying too much pressure.
After heavy compounding removes the bulk of oxidation, we step down to finer compounds. These medium-cut products use smaller abrasive particles to refine the surface, removing the scratches left by the heavy compound while continuing to address any remaining oxidation. The pad selection changes too—moving from aggressive cutting pads to foam polishing pads that provide more finesse.
The final polishing stage uses ultra-fine abrasives, often in the sub-micron range, to create that mirror-like finish. This step isn’t just cosmetic—it’s actually sealing the microscopic pores in the gelcoat, creating a smoother surface that’s more resistant to future oxidation. The goal is to achieve uniform gloss readings across the entire hull, typically aiming for readings in the 85-100 range on a gloss meter.
Between each stage, the surface needs to be thoroughly cleaned to remove compound residue. Any leftover material from a previous step will contaminate the next stage, reducing effectiveness and potentially causing new scratches. We use dedicated cleaners and fresh microfiber towels for each section, ensuring complete removal before moving to the next compound grade.
The entire multi-stage process on a moderately oxidized 30-foot boat can take 20-40 hours of actual machine time, not counting prep and cleanup. This is why DIY approaches often fall short—most boat owners simply don’t have the time, equipment, or experience to execute each stage properly. Rushing through stages or skipping steps might give you temporary improvement, but it won’t deliver lasting results.
Sometimes oxidation penetrates so deeply that compounding alone can’t reach fresh gelcoat. That’s when wet sanding enters the picture—a more aggressive technique that physically abrades the surface with ultra-fine sandpaper to remove heavily damaged material.
Wet sanding is exactly what it sounds like: sanding the gelcoat while keeping the surface wet to lubricate the abrasive and flush away removed material. But unlike wood sanding, marine gelcoat wet sanding uses extremely fine grits—typically starting at 1000 or 1200 grit for moderate damage, and potentially going as coarse as 600-800 grit only for severe cases with deep scratches or pitting.
The technique requires a delicate touch despite the aggressive nature of the process. Working by hand in most cases, we use a sanding block to keep pressure even and prevent creating low spots or waves in the gelcoat surface. The key is maintaining consistent pressure and overlapping the sanding pattern to avoid creating lines or uneven areas.
Water management during wet sanding is critical. You need constant lubrication to prevent the sandpaper from loading up with gelcoat residue, which would create scratches rather than smooth cutting action. We use spray bottles to keep a steady flow of water on the work area, with frequent rinsing to clear away the slurry of water and gelcoat particles.
After wet sanding removes the heavily oxidized layer, you still need to go through the complete compounding and polishing process described earlier. Wet sanding leaves a uniformly dull surface covered in fine scratches from the sandpaper. Those scratches need to be progressively refined through multiple stages of compounding and polishing before you’ll see that mirror finish return.
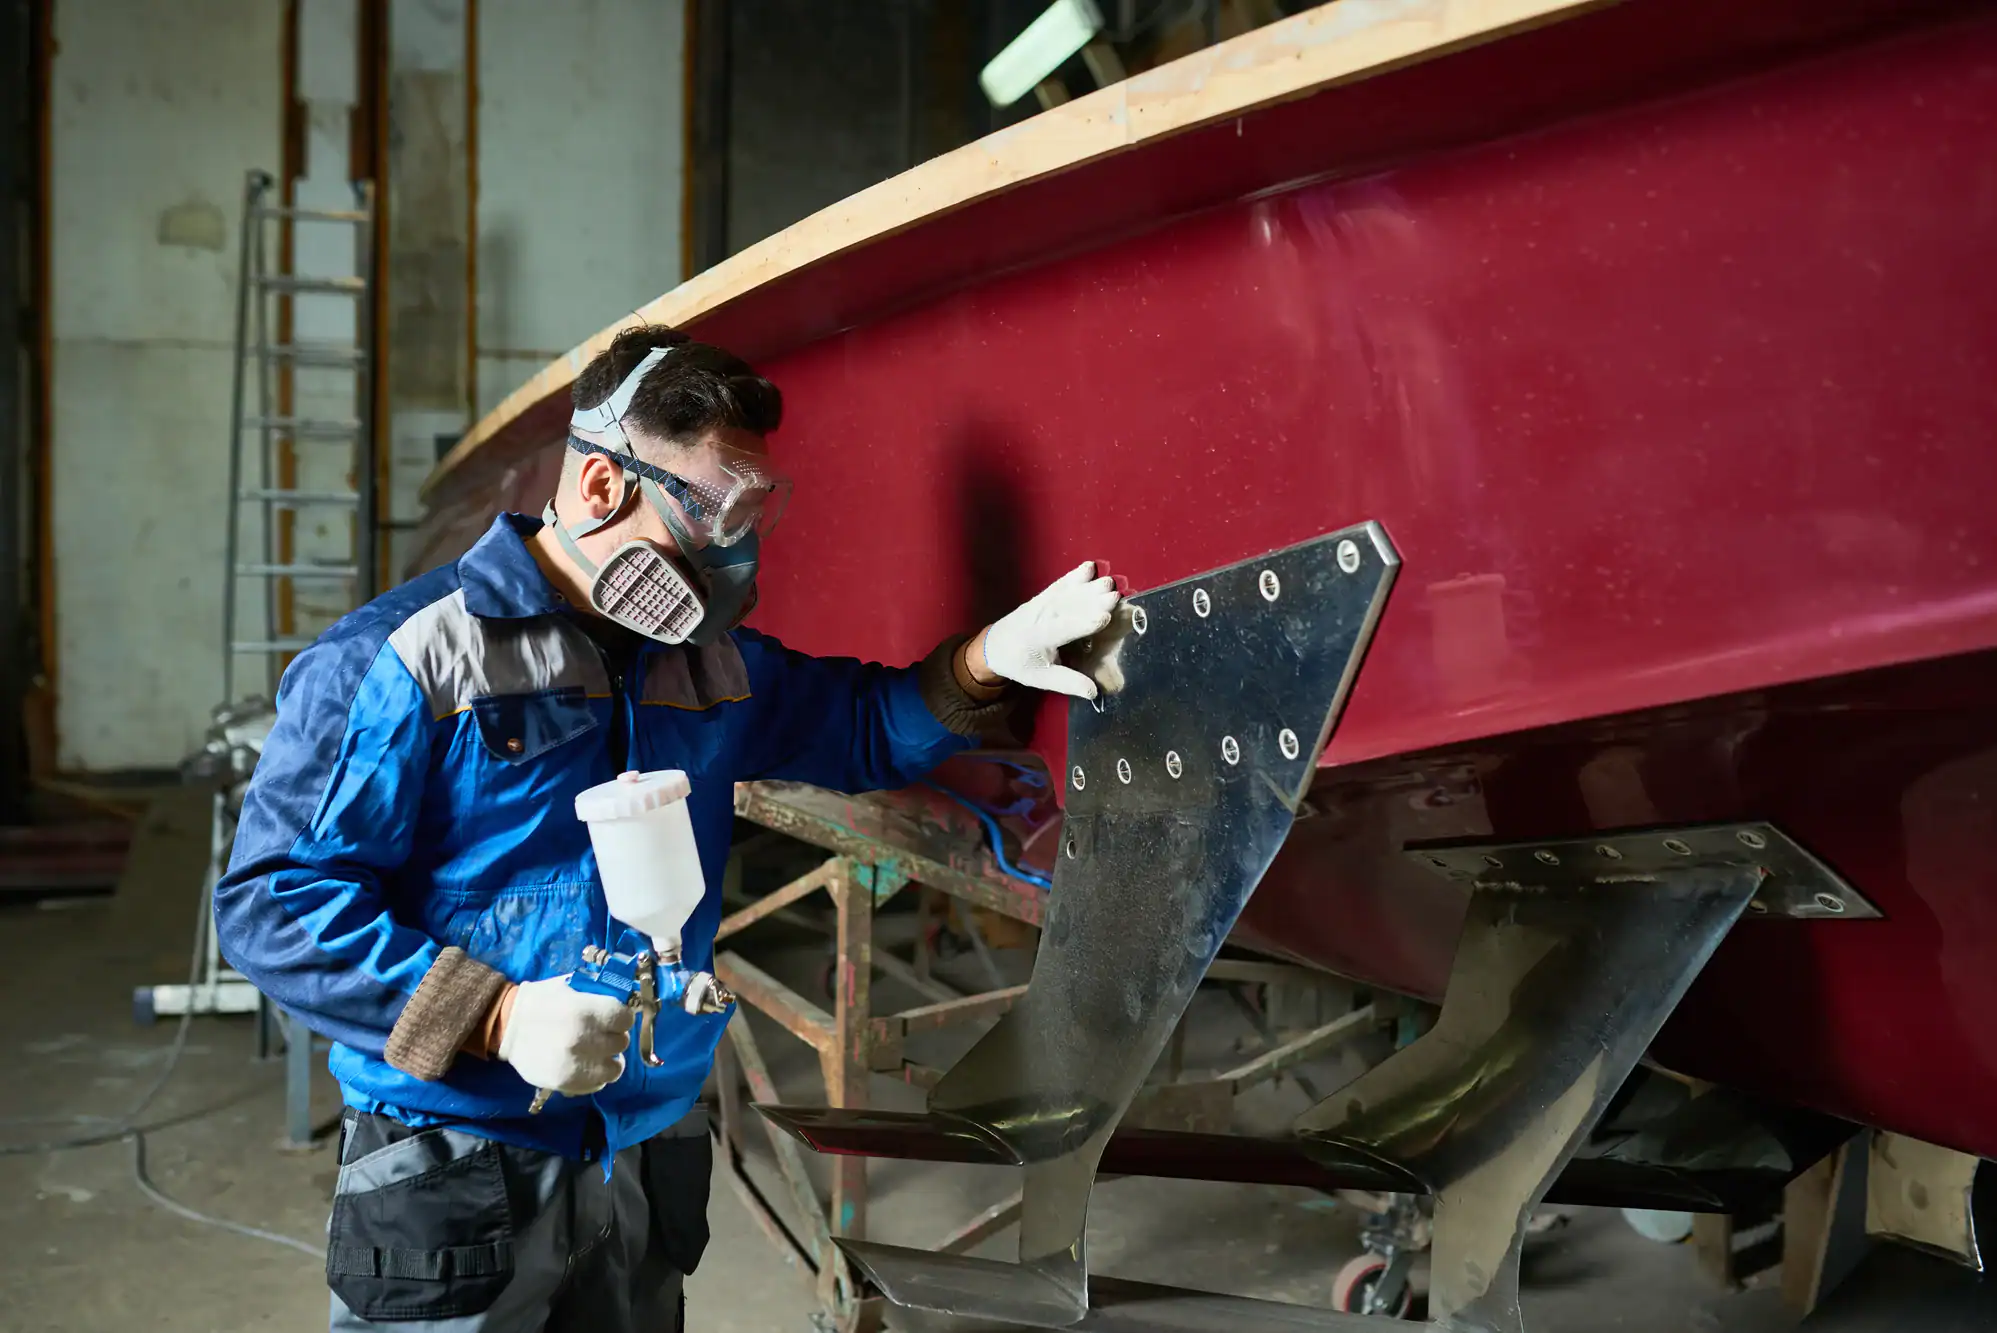
The risk with wet sanding is removing too much material. Gelcoat isn’t infinitely thick—it’s typically applied at 15-20 mils during manufacturing. Every time you sand or compound, you’re removing some of that thickness. On older boats that have been detailed multiple times over the years, the gelcoat might already be thin in high-wear areas. Sanding through to the underlying fiberglass laminate—called “burn through”—requires expensive repair work to fix. This is why we carefully assess gelcoat thickness before committing to wet sanding, and why we’re cautious about how aggressively we work.
For boat owners in Nassau and Suffolk Counties dealing with Atlantic UV exposure, wet sanding often becomes necessary after five to seven seasons of inadequate protection. The good news is that properly executed wet sanding can bring even severely oxidized gelcoat back to like-new condition. The bad news is that you’re essentially using up some of your gelcoat’s finite lifespan. This is why protection after restoration becomes absolutely critical—you can’t keep cutting into the gelcoat indefinitely.
Restoration is only half the equation. Without proper protection, you’ll be back to chalky oxidation within months, having wasted all that time and money on correction work.
Traditional marine wax simply doesn’t hold up in Long Island Sound conditions. Even premium carnauba-based waxes break down in weeks when exposed to constant salt spray, UV reflection, and temperature extremes. You end up in an endless cycle of waxing every few weeks throughout the season, spending more time maintaining your boat than actually using it.
Marine-grade ceramic coatings changed this equation entirely. These aren’t automotive products adapted for boats—they’re formulations specifically engineered for gelcoat and marine paint systems. The coating bonds at the molecular level to your gelcoat, creating a barrier that prevents salt crystallization, blocks up to 99.9% of UV radiation, and maintains hydrophobic properties even after constant water exposure. Professional-grade marine ceramic coatings last two to five years in harsh saltwater conditions, with graphene-enhanced formulations extending protection even further.
The cost comparison tells the story. Professional waxing services in Nassau County run $500-1,500 per application depending on boat size. Multiply that by four to six applications per season, and you’re spending $2,000-9,000 annually just maintaining basic protection. Ceramic coating requires a larger upfront investment—typically $2,000-5,000 depending on vessel size and surface condition—but that single application eliminates the constant reapplication cycle for years. Your maintenance routine becomes simple washing and occasional ceramic boost spray, saving you dozens of hours and thousands of dollars over the protection lifespan.
Beyond cost and time savings, ceramic coating delivers performance benefits that wax simply cannot match. The ultra-smooth surface reduces drag as your boat moves through water, improving fuel efficiency and top speed. Minor scuffs from dock contact or floating debris often buff out with simple polishing rather than requiring gelcoat repair. And when it comes time to sell, documented ceramic coating protection appears on maintenance records as proof of premium care, justifying higher asking prices and attracting serious buyers who recognize proper asset management.
For anyone who just invested in professional gelcoat correction, protecting that restored surface with ceramic coating isn’t optional—it’s essential. You’ve already removed oxidized material to expose fresh gelcoat. Without proper protection, that fresh surface will oxidize even faster than the original factory finish because you’ve opened up those microscopic pores during the correction process. Ceramic coating seals those pores, locks in the restored appearance, and prevents you from continually cutting into your gelcoat with repeated corrections down the road.
If you’re dealing with chalky oxidation, dull gelcoat, or you’re simply tired of the constant waxing cycle, we understand what your yacht faces in Long Island Sound’s demanding environment. Our professional marine gelcoat correction and ceramic coating protection preserve both your vessel’s appearance and its long-term value.
Article details:
Share:
Continue learning: